Monday 30 March 2015

4 Natural Beauty Treatments

Natural beauty products have been on the rise for the past few years. They are becoming more popular for women who want a chemical-free option, that can also prove to be more effective than shop bought beauty products. Without all the harsh chemicals or artificial colouring, natural products will be less likely to cause skin irritations.

I myself enjoy trying out natural products, because you don't spend as much money on them and not only are they better for your skin, they also contribute to a better environment!

So lets get started...

1. Lemon Sugar Body Scrub

Not only is this one of the easiest homemade beauty products to make ... It actually works!
 This sugar scrub is great for exfoliating your skin and leaves it refreshed and smooth.
Ingredients:

  • 2 1/2 cups of sugar (brown or white)
  • 1/2 a cup of oil (olive or coconut oil work well)
  • One half of a fresh lemon
Mix the sugar and oil together in a bowl - add a small amount of oil at a time until it reaches the right consistancy. You don't want it too runny. Next, squeeze the lemon juice into the mixture and add some lemon zest to give it a fresh smell. Add to a jar with a resealable lid, and thats it! You're all done and ready to give your home made scrub a try! 


I have tried this recipe and was very pleased. I used brown sugar because I find it feels nicer on your skin. The only thing I would change next time would be the olive oil, which I used, because i found it to be too oily for my skin. So when I make it again (which I will) I will use coconut oil. Other than that, this is a great homemade product, and I would recommend it!

2. Honey Face Mask

This is the simplest natural beauty recipe. It has only one ingredient - raw honey.
Honey is naturally anti-bacterial so is great for acne treatment and prevention. It is full of antioxidants so is great for slowing down aging, and it is also extremely moistuising and leaves the skin glowing!
 Just apply raw honey donto your face and let it sit for about 20 minutrs. Rinse off and your done. Do this a few times a week and see the difference in your skin!

Now, when I first heard about this, I wasnt so sure. I mean, how can putting something sticky on your face be any good for your skin, right? But I have tried this face mask and I have to say, I liked it. It left my skin glowing and feeling really soft!

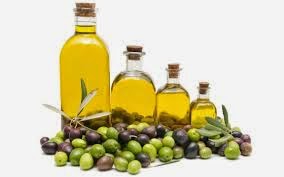
3. Olive Oil Hair Treatment 

Olive oil on your hair will work just as well, or better, than any drugstore/highstreet hair treatment. It has alot of benefits. It is a great dandruff treamtment as olive oil is a natural moisturizer, so when massaged into your scalp, it moisterizes your scalp and reducess the apperance of your dandruff naturally. It also adds shine, makes it easier to manage and softens your hair.
 Apply as you would your normall shampoo to damp hair. Let sit for 15 minutes and rinse out with warm water. You only need to do this once a week.
 I have also tried this one. This one i didn't like so much. Not that i'm saying it doesn't work ... I think it's just my hair. I have quite thin hair that tends to be flat all the time, no matter what i try to do with it! I think the oil just weighed it down even more and to me, it looked a bit greasy. Don't get me wrong, it did make my hair feel soft, but like I said, it's probably just my hair! I will be trying this again though as I did only try it once.

4. Olive Oil for Eyelash Growth

Just as Olive Oil makes hair growth healthier, it also helps the growth of eyelashes. It is a natural resource of vitamins and nutriunts, all of which are needed for healthy hair growth.
 Use a clean mascarra brush and apply a layer of olive oil to your eyelashes every night before you you go to bed and you should start seeing results after a short while.
 I have not tried this one yet! I need to because I wasn't blessed with long eyelashes. I am interested to know if this works.

Well thats it for this blog post. As always, I hope you enjoyed reading it!

If any of you have tried any of these natural treatments, or know anybody who has, let me know how they went in the comments! :)

Thanks for stopping by!

Speak soon...

Sophie ~ icraftgetoverit x


(All photos taken from Google Images - Not my own)

Saturday 28 March 2015

Funky and Fun nail art tutorial!

'So what if other people do not like your nail art? You do not do it for them.'

As you probably already know, I like to have freshly painted nails, that look good no matter what the season. I find most of the designs I have on YouTube. This design I am going to show you is inspired, again, by MissjenFabulous. I like her videos because she makes them easy to follow and has some great designs!

I am going to show you how to create this simple yet effective design in the comfort of your own home. And it doesn't matter if your not perfect at doing nails, no body is perfect! Hopefully this tutorial will be easy to follow and help you acheive this cute design.


You will need:

  • Your chosen colours of polish
  • Black and white nail stripers (or toothpick) 
  • Dotting tools (or toothpick)
  • Base and Top coats
As always, first thing you want to do is coat your nails with your favourite Base coat. Once your nails are dry, apply your chosen colour. I chose to do a different colour for each nail to make it more fun! But you can use just one colour if you prefere. 

When they are dry, use your black nail striper (or if you don't have one you can use a toothpick dipped in black polish) and draw a line straight down the middle of each nail. 

Take your white nail striper and draw two white lines either side of the black line. Like shown in the picture below. 

Next, take your dotting tool (or again, if you don't have a dotting tool, you can also use a toothpick to create the dots) and use black polish to create two dots on the black line on the center of your nail. 

Do the same with the white but make three dots on each white line. 

Wait for them to dry and use a smaller dotting tool to make dots in the opposite colours. So white dots in the center of the black ones you've made...

And black dots in the center of the white ones..

When all of your nails are completely dry, you can apply your favourite top coat. 

This nail design is super funky and fun! If you like this design, be sure to check out MissjenFabulous on YouTube for more cute and simple designs. 

I hope you enjoyed this post and it has inspired you to try this design! 

Let me know what you think! 

As always .. Thanks for stopping by and if you liked what you read, share, comment or like! :)

Speak soon..

Sophie ~ icraftgetoverit x

Tuesday 24 March 2015

My failed attemps at Water Marbling!

Water marbling. I have tried this only twice, but both times i have failed miserably.

Water marbling is a technique involving dripping nail polish into clear water and creating a pattern on the waters surface, this pattern is then transfered to your nails.


Well thats how its supposed to go anyway. This is what actually happened when i tried it.

So to start of with I found an old cup, I actually used a Mcdonalds cup, and filled it with water from the tap. For this technique you need "room temperature" water. Obviously tap water isn't room temperature, so I left it out over night   to hopefully acheive the correct temperature.

The next day, I was all set to do my nails. I had chosen the colours I wanted and had untightened the lids so I could easily remove the brush to drip polish into the water.
The first few drops were fine, they spread through the water nicely and all was looking good! Then for some reason, the drops stopped spreading and just kind of .. sat there.

I got a toothpick and tryed to make some sort of pattern with the polish. That failed. Everything just stuck to the toothpick and came out of the water.

So I tryed again.

This time the polishes sread nicely on the water and I was able to make a pattern. I placed my nail in the water and held it there for a few seconds. I got rid of all the excess polish off the water with the toothpick before taking my nail out. Well ... the polish hadn't set in a nice, pretty pattern as i had hoped. Instead, the colours had all merged together and it had gone bubbly and lumpy. Basically, it just looked like a horrible, brown, lumpy mess on my nail.

I don't know where I went wrong or if I wasn't doing something right, but like I said, I failed miserably! Twice!

If you have any tips or know where I went wrong, please do let me know!

I am going to attempt this technique again and I will keep you updated on how it goes. Hopefully it will turn out better than before. You know what they say 'Third time lucky'. We'll see.

Well thanks for coming along to read my post! If you like my posts and want more ... let me know in the comments! :)

Speak soon!

Sophie ~ icraftgetoverit x

(Image not mine, found on google images)

Sunday 22 March 2015

Easy Spring/Summer nail art Tutorial

'The only time a woman is helpless is when her nail polish is drying. Other than that, watch out.' 

Do you like to have nails that look good all year round, but can't afford or dont have the time to always get them done by a professional? 

Well today I am going to share with you another tutorial that is perfect for Spring/Summer!
 Hope you enjoy :) 


For this design, you can choose any colours you like to make it to your taste. I choose to use blue, pink, orange and green because they are nice and bright, and perfect for the time of year. Anyway, lets get on with it! 

You will need: 

  • Base coat and Top coat
  • White nail polish
  • 4 nail polish colours of your choice
  • Dotting tool/ Toothpick/ Bobby pin
First thing you should always do before painting your nails is apply a base coat to protect your nails. Once this is dry, you can paint atleast two coats of white polish onto every nail.


Wait until the white is fully dry and choose your first colour. Using a medium sized dotting tool, put one dot in the corner of each nail. You can alternate between corners for each nail. 


For this next step use a smaller dotting tool (Optional). Using your first dot as the center piont, dot your second colour around it in a circle shape. 


Back to using your medium size dotter, use your third colour to creat more dots going around the outside of the ones you've just done. 


For your last row, use the smaller dotting tool and your final chosen colour. 


Apply your favourite top coat to make the design last longer and make your nails nice and shiny, and we're all done! 


This cute nail design is super easy and doesn't take long to do. You can now go out and show off your freshly painted nails! 

I hope you liked this tutorial, Thanks for reading and ill be back soon with more! :) 

If you liked this tutorial, please share, like or comment and let me know. 
(Inspired by MissjenFabulous ~ YouTube)

Thanks..

Sophie ~ icraftgetoverit x


Monday 16 March 2015

Easy Nail Art Tutroial

Have you ever seen any DIY projects online or on pictures and wandered how it was done, but there are no instructions nor a tutorial on how to do it?

I know i have and it can be frustrating!

So i am going to share with you a step by step tutorial on how to acheive this simple yet effective nail look in the comfort of your own home.

You will need:

  • White nail varnish
  • Your chosen colour(s) of nail varnish
  • Black and white nail stripers (or a toothpick)
  • Base coat and Top coat

To start off, cover your nails with your base coat to protect them and stop them getting stained. Next, apply your white nail varnish. 


When the white is fully dried, take your black nail striper, or you can use a toothpick dipped in black varnish if you don't have a striper, and make four small diagonal lines from the edge of your nail going towards the middle.


Do this on every nail and wait for them to dry. Once dried, take your chosen colour and paint a straight line down the centre of your nail, from top to bottom. You can use the same colour on every nail or choose a different colour for each nail. Wait for them to dry.


Now take your white nail striper (or toothpick) and draw four diagonal lines, in the opposite direction to the black lines you drew, across the colour down the centre of your nail.


Use your black nail striper again to draw the last black lines in the opposite direction to the white lines, starting from the middle of your nails, going to the edge.                                       


Finish off with your top coat and your done!

People will think you spent ages doing your nails when really, it didnt take long at all! 
(Inspired by MissjenFABULOUS - YouTube)

Thanks for reading and i hope this helped inspire you! 
If you would like more nail tutorials, please feel free to comment and let me know. 

Sophie ~ icraftgetoverit  x